 Recipe Treasure Chest
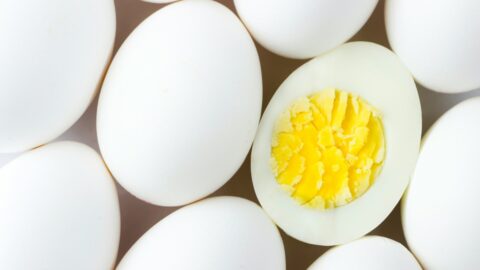
Have you ever struggled with making hard-boiled eggs that turned out rubbery or chalky? Fear not! I’m here to help you achieve egg-cellent results every time. Whether you’re making a quick protein-packed snack or deviled eggs for a party, mastering the art of hard-boiling eggs is a valuable kitchen skill worth having. Let me guide you through the process step-by-step to help you achieve perfect hard-boiled eggs every time.
Understanding the Basics of Hard-Boiling Eggs:
Alright, let’s start with the basics. What exactly is a hard-boiled egg? Well, it’s simply an egg that’s been cooked in its shell until both the white and yolk are firm. Now, you might be wondering, “Why bother with hard-boiled eggs when there are so many other ways to cook them?” Good question! Hard-boiled eggs are incredibly versatile. You can slice them up for salads, mash them into egg salad sandwiches, or just sprinkle a little salt and pepper on them for a quick and easy snack.
Selecting the Right Eggs:
It’s important to choose the right eggs for the job. Freshness matters when it comes to eggs, so be sure to check the expiration date before you start. If you’re unsure about the freshness of an egg, here’s a little trick I learned from my grandma: Fill a bowl ¾ full and gently place the egg in the water. If it sinks to the bottom and lays flat on its side, it’s fresh. If it stands upright or floats, it’s past its prime.
Preparing the Eggs for Cooking:
Now that you’ve selected your eggs, it’s time to prep them for cooking. Some folks swear by letting eggs come to room temperature before boiling, but honestly, I’ve never noticed much of a difference. As long as your eggs are clean and free of any cracks, you’re good to go. Oh, and speaking of cracks, here’s another tip: if you accidentally crack an egg while trying to get it into the pot, don’t worry! Just add a little splash of vinegar to the water to help prevent the whites from leaking out.
The Perfect Hard-Boiling Technique:
Here’s my method for hard-boiling eggs:
- Equipment Needed: Saucepan, Eggs and Water
Step-by-Step Instructions:
Let’s get to making hard-boiled eggs:
- Place your eggs in a single layer at the bottom of a saucepan.
- Add enough cold water to cover the eggs by about an inch. This helps prevent them from cracking while they cook.
- Bring the water to a gentle boil over medium heat. You don’t want a rapid boil here, just a nice, steady simmer.
- Once the water is boiling, cover the saucepan and remove it from the heat. This is where the magic happens!
- Let the eggs sit in the hot water for the desired amount of time. This will depend on how firm you want your yolks. For soft-boiled eggs, aim for about 4-6 minutes. For medium-boiled eggs, go for 8-10 minutes. And for hard-boiled eggs, let them hang out for a solid 12-14 minutes.
- Next, prepare a large bowl of ice water. This will be used to halt the cooking process and prevent the eggs from overcooking.
- Once you have timed the eggs to your desired level of doneness, use a slotted spoon or tongs to carefully remove the eggs from the hot water or pan. It’s important to do this gently so that the eggs don’t crack or break. Place the eggs into the ice water, making sure that they are fully submerged.
- Allow the eggs to sit in the ice water for approximately 10 minutes. After 10 minutes, remove the eggs from the ice water and dry them off with a paper towel or cloth. The eggs are now ready to be peeled and eaten or used in your desired recipe.
Tips for Peeling Eggs:
- Roll the egg gently on the countertop to crack the shell all over before peeling.
- Start peeling at the wider end of the egg, where the air pocket is located.
- Peel under cold running water to help loosen the shells.
Storing and Serving:
Congratulations on boiling and peeling your eggs! Now it’s time to choose how to serve them. The serving options are endless – you can slice them up and add them to salads, sandwiches, or grain bowls. You can also mash them with a little mayo and mustard to make classic egg salad or sprinkle them with salt and pepper for a quick and easy snack. If you’re not going to use the eggs right away, don’t peel them, as this can cause them to dry out. Instead, store them in the refrigerator for up to a week.
Troubleshooting A Common Issue:
Green Ring Around the Yolk:
This happens when eggs are cooked for too long or at too high a temperature. To prevent it, be sure to remove the eggs from the hot water as soon as they’re done cooking and transfer them to an ice bath.
Overcooking or Undercooking:
Ah, the delicate dance of achieving the perfect hard-boiled egg. It’s a fine line between undercooked and overcooked, and it’s all too easy to tip the scales in one direction or the other. Let’s start with overcooking. We’ve all been there – eagerly anticipating a batch of beautifully boiled eggs, only to be greeted by a disappointing sight: a green ring encircling the yolk. This unsightly phenomenon occurs when eggs are cooked for too long or at too high a temperature, causing the sulfur in the egg whites to react with the iron in the yolks. The result? A less-than-appetizing greenish hue and a slightly sulfurous taste.
To avoid this egg catastrophe, it’s crucial to remove your eggs from the hot water as soon as they’re done cooking. As soon as that timer goes off, get those eggs out of the pot and into an ice bath to stop the cooking process dead in its tracks. This rapid cooling not only prevents the green ring from forming but also helps to ensure that your eggs are perfectly cooked every time.
But what if you find yourself on the other end of the spectrum – staring down a batch of disappointingly undercooked eggs? There’s a simple solution to this problem as well. The next time you boil a batch of eggs, try adjusting the cooking time by a minute or two until you find the perfect balance. Remember, cooking times can vary depending on factors like the size of the eggs and the altitude at which you’re cooking, so don’t be afraid to experiment until you find what works best for you.
With a bit of patience and practice, you will be able to hard-boil eggs like a pro in no time. So, go ahead and put your new skills to the test by preparing a batch of your favorite egg dishes. And always keep in mind that the most important ingredient of all is love. Happy cooking!”