To be honest, when I first heard about white chicken chili, I wasn’t sold. In my mind, chili had always been a bold, red, beef-based dish. But one snowy evening, my husband suggested trying it, and I decided to give it a go. Armed with chicken thighs from the fridge and a can of Great Northern beans from the pantry, I set out to make my first batch. The result? A new family favorite that’s now a permanent part of our menu rotation.
What Makes White Chicken Chili Special?
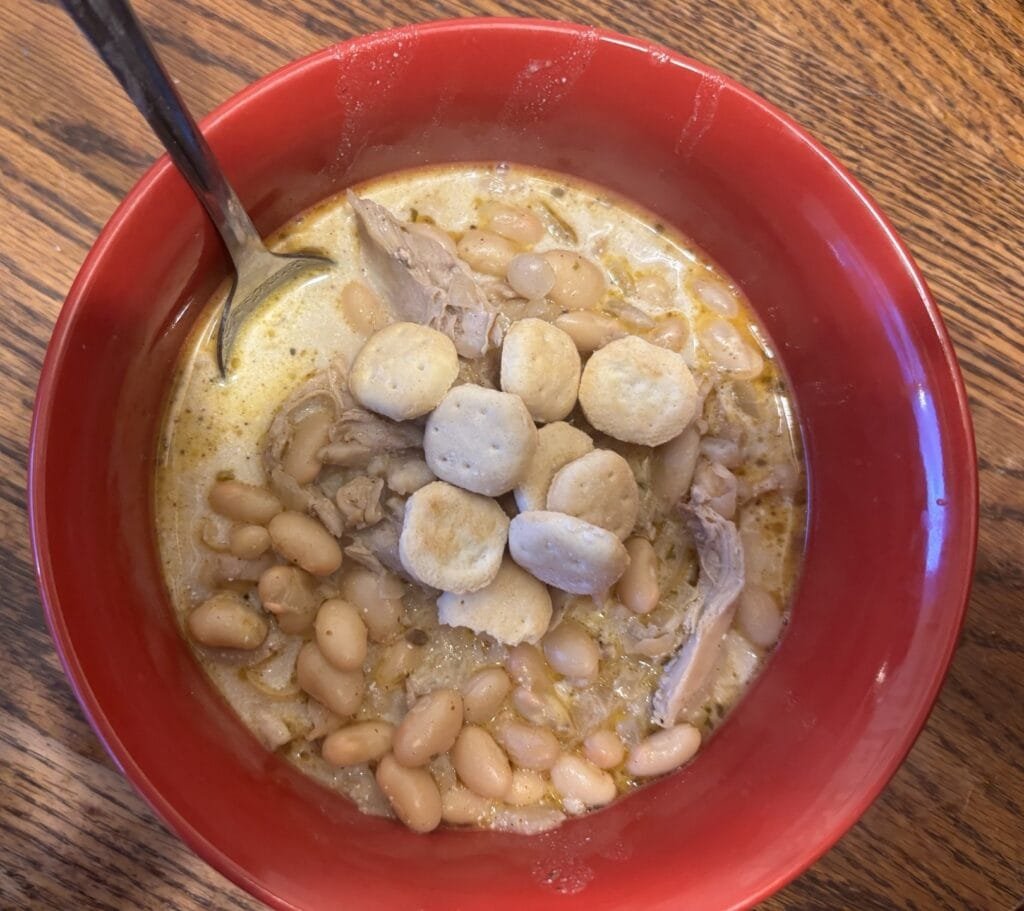
Unlike the traditional tomato-based chili, white chicken chili is lighter yet still incredibly satisfying. It swaps out beef and tomatoes for tender chicken, white beans, and a creamy broth, creating a dish that’s as comforting as it is unique. The flavors are balanced, rich without being heavy, with spices that warm you up from the inside out.
Key Ingredients for White Chicken Chili
The Chicken
You have a few options for the chicken in this recipe. Shredded rotisserie chicken works wonderfully if you’re short on time. If you’re cooking from scratch, chicken thighs are my go-to choice. They’re juicy, flavorful, and hold up well during cooking. However, if you prefer chicken breast, it works just as well! Simply cook the chicken until tender and shred it into bite-sized pieces, letting it soak up the flavorful broth. If you’re looking for guidance on how to prepare your own shredded chicken, check out my shredded chicken for quick meals.
White Beans
Great Northern beans are the foundation of this dish, lending it both texture and heartiness. Their creamy consistency makes them a perfect match for the rich broth. If you don’t have Great Northern beans on hand, cannellini or navy beans are excellent substitutes.
Broth and Dairy
The soul of white chicken chili lies in its creamy base. A mix of chicken broth, heavy cream, and sour cream creates a luscious texture and depth of flavor. The broth provides the savory backbone, while the cream adds richness without overwhelming the palate.
Spices and Aromatics
This is where the magic begins. Onion, garlic, and a medley of spices like cumin, oregano, and chili powder infuse the chili with layers of warmth and aroma. These simple ingredients work together to create a bowl of chili that’s anything but ordinary.
How to Make Creamy White Chicken Chili
Once you’ve gathered your ingredients, the process is straightforward. In about 30 minutes, you’ll have a pot of white chicken chili that tastes like you spent hours perfecting it.
Step 1: Prep Your Ingredients
Start by prepping everything ahead of time. Chop the onion, mince the garlic, measure out your spices, and shred your chicken. Season the chicken with a pinch of salt and pepper to enhance its flavor during cooking.
Step 2: Sauté Aromatics
In a large pot or Dutch oven, melt butter over medium heat. Add the chopped onion and cook until it becomes soft and translucent, about 5 minutes. Add the minced garlic and sauté for another minute.
Step 3: Combine Beans, Broth, Chicken, and Spices
Next, stir in the white beans, chicken broth, shredded chicken, and spices. This is where the chili starts to come together, and the wonderful aroma fills your kitchen. Bring the mixture to a gentle boil, then reduce the heat and let it simmer for about 30 minutes. The flavors meld beautifully during this time, creating a robust base.
Step 4: Add Cream and Sour Cream
As the final step, stir in the heavy cream and sour cream. Let the chili simmer for another 5 minutes, allowing the creamy components to blend into the broth. This transforms the dish into a luxurious, velvety masterpiece.
Serving and Toppings
White chicken chili is incredibly versatile when it comes to toppings. Here are some of my favorite ways to garnish it:
- Shredded cheese: Monterey Jack or cheddar adds a melty, cheesy element.
- Avocado slices: A creamy, fresh contrast to the warm chili.
- Cilantro: A sprinkle of chopped cilantro brightens up the flavors.
- Lime wedges: A squeeze of lime juice adds a refreshing tang.
- Crackers or tortilla chips: Perfect for scooping or adding a bit of crunch.
Ladle the chili into bowls, pile on your favorite toppings, and get ready to savor every spoonful.
Why You’ll Love White Chicken Chili
White chicken chili hits all the right notes. It’s:
- Quick to make: Ready in about 30 minutes, but tastes like it simmered all day.
- Full of flavor: The perfect balance of creaminess, spice, and warmth.
- Family-friendly: Even picky eaters will love it!
- Versatile: You can customize the ingredients and toppings to suit your preferences.
Whether it’s a weeknight dinner, a cozy weekend meal, or a crowd-pleasing dish for a potluck, this recipe never fails to impress.
Here’s how you can store your white chicken chili to keep it fresh and delicious for later:
How to Store White Chicken Chili
In the Refrigerator
- Cool Down First: Before storing, allow the chili to cool to room temperature. This prevents condensation and keeps it fresher.
- Use an Airtight Container: Transfer the chili to an airtight container to maintain its flavor and texture.
- Storage Time: Properly stored, white chicken chili will stay fresh in the fridge for 3 to 4 days.
In the Freezer
- Choose Freezer-Safe Containers: Use heavy-duty freezer bags or freezer-safe containers for longer storage. Leave some space at the top to account for expansion during freezing.
- Label and Date: Always label your containers with the date to track how long it’s been stored.
- Storage Time: White chicken chili can be frozen for up to 3 months.
Tips for Storing and Reheating
- Avoid Overheating: When reheating, don’t boil the chili, as it can cause the cream to separate.
- Portion Before Freezing: Divide the chili into single-serving portions before freezing for easy, ready-to-eat meals.
- Fresh Toppings: Add fresh toppings (like cheese, avocado, or cilantro) after reheating to keep them vibrant and flavorful.
Proper storage ensures that your white chicken chili tastes just as delicious the second (or third!) time around. Perfect for meal prep or saving leftovers for busy days!
Have You Tried This Recipe?
If you’ve made this white chicken chili, I’d love to hear about it! Share your thoughts, tips, and creative twists in the comments below. Did you add any unique toppings or swap out ingredients? Let’s inspire each other in the kitchen!
If you enjoyed this recipe, don’t forget to rate it and share it with friends and family. Snap a photo of your creation, tag us on social media, or link back to this page, we can’t wait to see how you make this dish your own.
Happy cooking!