Easy Crusty French Bread: A Homemade Delight
Hey there, fellow bread enthusiasts! If you’re anything like me, the mere thought of sinking your teeth into a freshly baked loaf of crusty French bread sends waves of anticipation through your taste buds. There’s something undeniably magical about the aroma of bread wafting through the kitchen, signaling that a delicious treat is on the horizon.
Now, I know what you might be thinking: why bother making bread from scratch when you can easily pick up a loaf from the store? Well, let me tell you, there’s nothing quite like the satisfaction that comes from baking your own bread. Not only does it allow you to control the quality of ingredients that go into your loaf, but there’s also a sense of pride that comes with creating something delicious with your own two hands.
The Joy of Simple Ingredients
One of the things I love most about baking bread is the simplicity of the ingredients involved. All you really need is flour, water, yeast, and salt. That’s it! There’s something incredibly liberating about stripping away the complexities of modern life and getting back to basics in the kitchen.
Essential Tools for Bread Baking
Now, before we dive into the nitty-gritty of baking our Easy Crusty French Bread, let’s talk about the tools you’ll need to get started. While you don’t need anything fancy to make bread, having the right tools can certainly make the process easier and more enjoyable.
Must-Have Baking Tools: First up, you’ll need a few basic items: mixing bowls, measuring cups, and a baking sheet. These are the bread-baking essentials, the building blocks of your culinary masterpiece.
Optional but Helpful Tools: If you’re feeling adventurous, you might also want to invest in a few optional tools to take your bread to the next level. A dough scraper can be incredibly handy for working with sticky dough, while a proofing basket can help your loaves maintain their shape as they rise.
Step-by-Step Guide to Perfect French Bread
Now that we’ve got our ingredients and tools at the ready, it’s time to roll up our sleeves and get baking! Follow along as we take you through each step of the process, from mixing the dough to pulling the finished loaves out of the oven.
Mixing and Kneading: Start by mixing together your flour, water, yeast, olive oil, sugar and salt . Once combined add water until a shaggy dough forms. Then, cover the bowl and let rest for 15 minutes. Turn the dough out onto a lightly floured surface and knead it until it’s smooth and elastic. This is where the magic happens, so don’t rush the process. Take your time and enjoy the meditative rhythm of kneading dough.
First Rise: Once your dough is kneaded, it’s time to let it rest and rise. Place it in a lightly oiled bowl, cover it with a clean kitchen towel, and let it do its thing for about an hour or until it’s doubled in size. This is when the yeast works its magic, creating those beautiful air pockets that give French bread its signature texture.
Shaping the Loaves: After the first rise, punch down the dough to release any air bubbles, then divide it into two equal portions. Shape each portion into a long baguette shape, pinching the seams closed as you go. Don’t worry if your loaves aren’t perfectly uniform – rustic imperfection is part of the charm of homemade bread.
Final Rise and Preparation: Once your loaves are shaped, it’s time for one final rise before baking. Place them on a baking sheet lined with parchment paper, cover them loosely with a clean kitchen towel, and let them rise for another 30-45 minutes.
While they’re rising, preheat your oven to 375°F (190°C) to ensure it’s nice and hot when it’s time to bake.
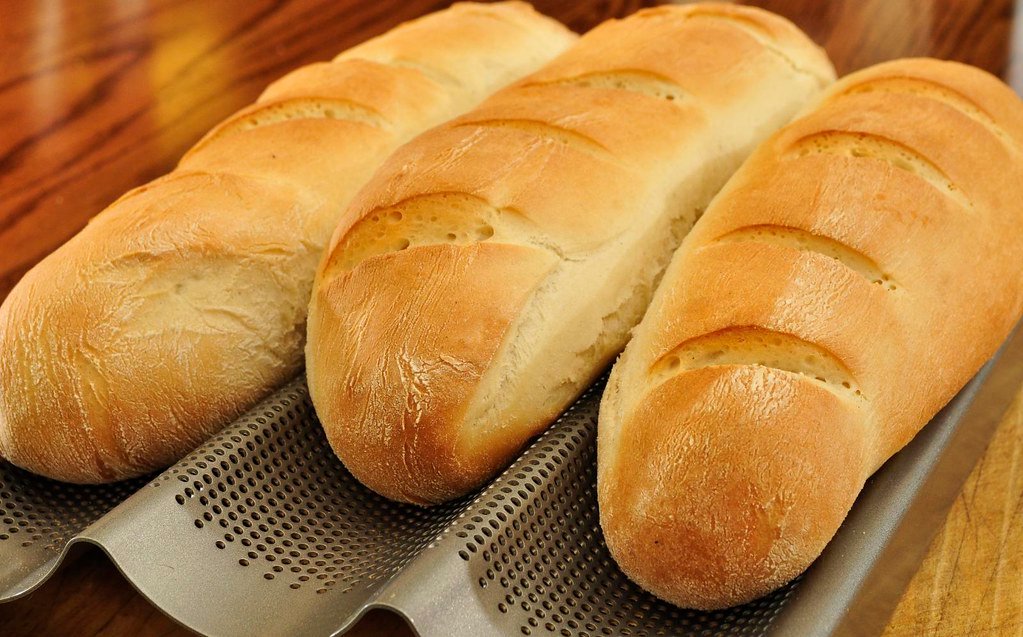
Baking: Ah, the moment of truth has arrived! With your loaves risen and your oven preheated, it’s time to slide those babies into the oven and watch as they transform into golden brown beauties.
Troubleshooting Common Issues
If your bread doesn’t turn out quite as expected, don’t panic! Bread baking is as much art as it is science, and there are plenty of factors that can affect the outcome.
If your bread is too dense, it may have been over-kneaded or under-proofed. If the crust is too pale, try increasing the oven temperature or baking for a few minutes longer.
Serving and Storing French Bread
Now that your loaves are out of the oven and cooling on the counter, it’s time to start thinking about how you’ll enjoy them. French bread is incredibly versatile and can be enjoyed in a variety of ways, from slathering it with butter and jam for breakfast to using it as the base for a delicious sandwich at lunch.
For a truly French-inspired meal, serve your bread alongside a bowl of soup or use it to make a classic French sandwich. Or, if you’re feeling fancy, whip up a batch of homemade garlic butter and use it to make the ultimate garlic bread.
If you have any leftovers (though let’s be honest, fresh bread rarely lasts long), store them in a paper bag at room temperature for up to two days. To reheat stale bread, simply wrap it in aluminum foil and warm it in a 350°F (175°C) oven for 10-15 minutes, or until it’s warmed through and crusty once again.
And there you have it – your guide to baking Easy Crusty French Bread at home! I hope you’ve found this recipe helpful and inspiring, and that it’s encouraged you to roll up your sleeves and give bread baking a try.
Remember, practice makes perfect, so don’t be discouraged if your first loaf isn’t quite picture-perfect. The most important thing is to have fun and enjoy the process. Happy baking!