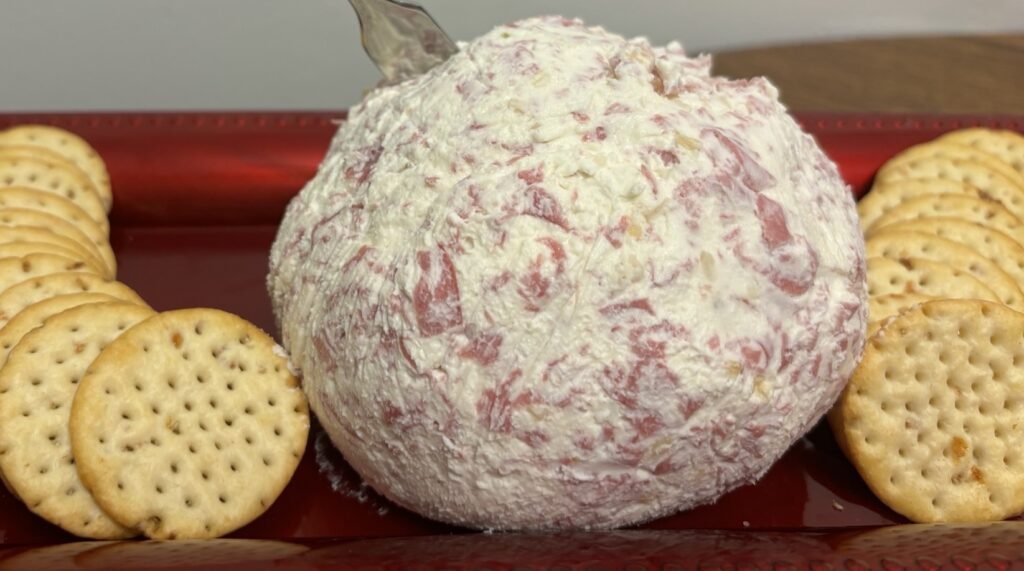
When it comes to hosting gatherings or casual get-togethers, having a few go-to recipes can make all the difference. One of my personal favorites, and a real crowd-pleaser, is the easy corned beef cheese ball. It’s creamy, savory, and packed with flavor plus, it’s incredibly simple to whip up. If you’re looking for an appetizer that will have your guests raving, this is it.
Ingredients You’ll Need
To make this cheese ball, you’ll need a few key ingredients that come together to create a savory and satisfying appetizer:
Corned Beef:
3– 2oz. packages of corned beef lunch meat.
Softened Cream Cheese:
This forms the creamy base of your cheese ball. Make sure it’s softened before mixing to ensure a smooth consistency.
Dry Cottage Cheese:
Adding dry cottage cheese gives the cheese ball a unique texture and extra depth of flavor. It’s an often overlooked ingredient, but it really makes a difference.
Dry Minced Onion:
Provides a concentrated onion flavor that’s milder and more subtle than fresh onion. It adds a savory depth without overwhelming the other ingredients.
Worcestershire Sauce:
A splash of Worcestershire sauce adds a tangy, pleasant savory taste that enhances all the other flavors in the cheese ball.
Mix, Chill, and Impress with Your Cheese Ball
Prepare Your Ingredients
Start by gathering all your ingredients. You want everything ready to go before you start mixing. I find that laying everything out helps streamline the process and ensures you don’t forget anything. It also makes cleaning up a bit easier, something that’s always a win in my book.
Mix the Base
In a stand mixer, combine the softened cream cheese and dry cottage cheese. The dry cottage cheese will add a bit of texture and a slightly tangy flavor that compliments the cream cheese and corned beef. Mix them together until well-blended. You’re looking for a smooth, creamy consistency. This is the base of your cheese ball, so make sure it’s thoroughly combined.
Since my sister first brought this cheese ball to a family gathering, I’ve made it a tradition to request it every year. The first time I decided to recreate it for a casual evening with friends, I was a bit nervous about getting the taste just right. However, the straightforward mixing process made it surprisingly easy. I focused on ensuring thorough mixing to achieve the ideal consistency, just like my sister’s.
Add The Corned Beef
Once you’ve got your base ready, it’s time to add the corned beef. You’ve got two options: either chop it up like a pro with a knife or channel your inner caveman and tear it apart with your bare hands. No judgment here, choose your adventure.
Stir in Worcestershire Sauce
Now, add the Worcestershire sauce. This ingredient is crucial for adding a rich, savory flavor that ties everything together. Don’t go overboard, just a teaspoon will do the trick. Stir it in until the flavor is well incorporated.
Mix in Minced Onion
Fold in the dry minced onion. While fresh onions can add moisture and crunch, dry minced onions contribute a different texture. They blend into the cheese ball mixture without adding extra moisture, which helps maintain the desired creamy consistency. This textural balance is crucial for achieving the perfect cheese ball that’s smooth and easy to spread but still has a slight bite.
Shape and Chill
Form the mixture into a ball. Chill the cheese ball for at least an hour in the refrigerator this will help it firm up and make it easier to serve. I’ve found that letting it chill overnight actually enhances the flavors even more, so it’s a great make-ahead option.
Optional Coating
If you want to add a little extra texture, you can coat the cheese ball with chopped nuts. Simply roll the chilled cheese ball in your chosen coating until it’s evenly covered. This step is optional but adds a delightful crunch and extra flavor.
Presentation Tips
When it comes to serving your cheese ball, presentation matters. Here are a few tips to make your appetizer look as good as it tastes:
Consider pairing it with a selection of crackers, sliced baguette, bagel chips, or pita bread to provide a range of textures and flavors that perfectly complement the cheese. Personally, I find that onion crackers are the perfect choice to accompany this cheese ball.
And there you have it, your easy corned beef cheese ball is ready to impress at your next gathering. This recipe is not only simple but also a guaranteed crowd-pleaser. Whether you stick to the classic version or add your own twist, it’s a delicious and versatile appetizer that everyone will love.
Have you tried making this cheese ball yourself? I’d love to hear about your experience! Drop a comment below and share your thoughts, tips, or any creative variations you’ve come up with. Let’s keep the conversation going and inspire each other with new ideas!
Happy cooking!


