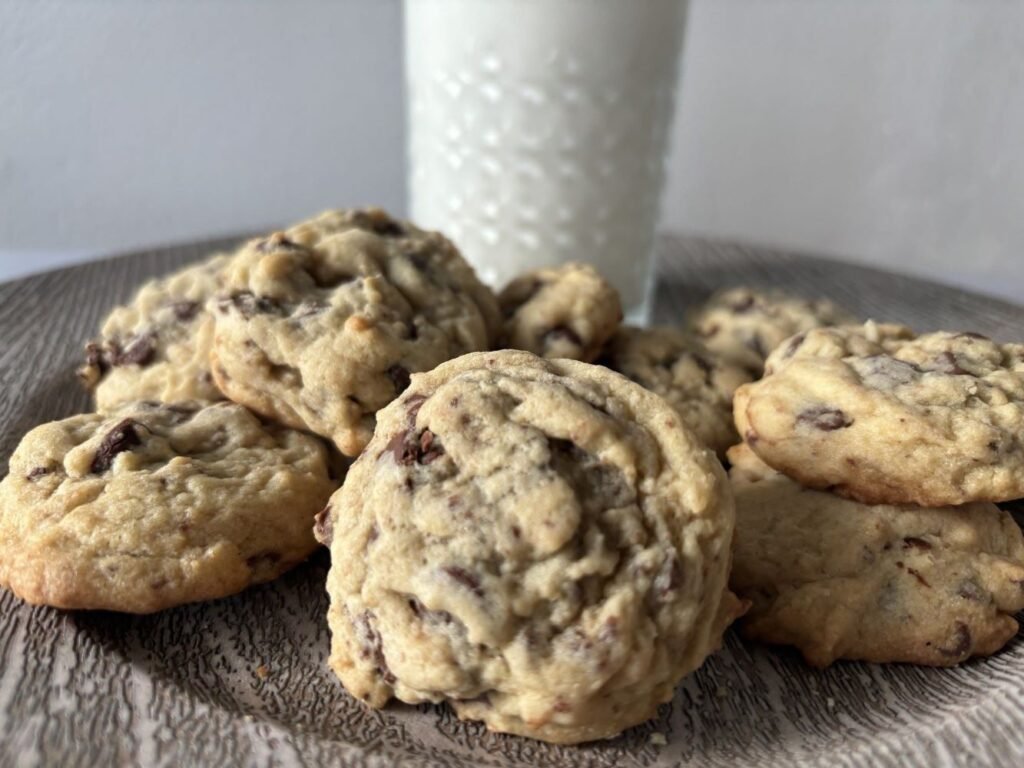
I remember making chocolate chip cookies with my mom as a kid. I can still picture her pulling out the old, worn-out recipe card tucked in her recipe box. The smell of butter and sugar creaming together still brings back memories of eagerly waiting by the oven, hoping to snag a cookie as soon as it cooled enough to hold together. Sadly, I’ve lost the card, so I’ve decided to create my own version of the chocolate chip cookie.
These cookies are a timeless favorite for a reason. They’re simple and easy to make, and they hit that perfect balance of chewy center and crispy edges.
From Sweet Accident to Icon: The Delicious History of Chocolate Chip Cookies
Did you know that the chocolate chip cookie was invented by accident? It’s true! Back in 1938, Ruth Wakefield, the co-owner of the Toll House Inn in Massachusetts, was whipping up a batch of chocolate butter drop cookies. She ran out of baker’s chocolate and decided to chop up a bar of semisweet chocolate as a substitute, expecting it to melt into the dough.
Well, it didn’t melt—and instead, she ended up creating what we now know and love as the chocolate chip cookie! The recipe became famous after being published in a Boston newspaper, and soon, Nestlé began printing the recipe on their chocolate chip bags. Talk about a happy accident!
Since then, chocolate chip cookies have become a beloved staple in American households. I mean, who hasn’t reached for a warm cookie fresh out of the oven?
What Makes These Cookies Special?
So, what sets these classic chocolate chip cookies apart from other recipes? It’s all about the balance of ingredients and simple techniques. The key to great cookies is getting the right texture, you want a cookie that’s soft and chewy in the middle, with just the right amount of crisp around the edges.
Cookie Chemistry: How Each Ingredient Makes Magic in Chocolate Chip Cookies
Each ingredient in a chocolate chip cookie recipe plays an important role. Here’s a quick breakdown of what goes into making the perfect batch:
Flour: All-purpose flour gives these cookies structure. Too much flour and your cookies will be dense and dry; too little, and they’ll spread too thin.
Butter: I always use unsalted butter, and it’s best when softened at room temperature. Butter is what gives the cookies their rich, creamy flavor. Pro tip: Don’t melt the butter—softened butter creams better with the sugar and creates that perfect cookie texture.
Sugar: A combination of granulated sugar and brown sugar is the key to both sweetness and moisture. Brown sugar makes the cookies chewy, while granulated sugar helps with crispness.
Eggs: Room-temperature eggs blend more smoothly into the dough, helping with consistency. They’re what make the dough nice and rich.
Vanilla Extract: A good vanilla extract enhances the flavors of the cookie. Trust me, it makes a difference!
Chocolate Chips: Now, for the star of the show semisweet chocolate chips! They hold their shape during baking and give that classic chocolatey goodness. But if you’re a dark chocolate fan, you can enhance the flavor by adding dark chocolate chips.
Milk chocolate wafers: Milk chocolate wafers melt beautifully in the oven, creating creamy, molten pockets of chocolate in the cookie.
Baking Soda, Baking Powder & Sea Salt: These two are the unsung heroes. Baking soda helps the cookies rise, and salt balances the sweetness, making everything taste just right.
A Simple Guide to Perfect Chocolate Chip Cookies
Let’s get into the fun part—baking these delicious cookies! Follow these steps, and you’ll have a batch of perfect classic chocolate chip cookies in no time.
1. Mixing the Dough
Start by creaming together the butter and sugars. This step is important because it creates the base for a light and fluffy cookie. Beat them until the mixture is light and fluffy, don’t rush this step! Then, add your eggs and vanilla extract, mixing until combined.
In a separate bowl, sift together the flour, baking soda, baking powder, and sea salt. Slowly add the dry ingredients to the wet ingredients, mixing just until combined. Overmixing here can lead to tough cookies, and we definitely want to avoid that.
Finally, fold in the chocolate chips and chopped milk chocolate wafers. Be careful not to munch on too many while mixing them in – I know it’s hard to resist!
2. Chilling the Dough
Here’s a little secret I learned: chill the dough for at least 30 minutes before baking. Chilling helps the flavors develop and prevents the cookies from spreading too much in the oven. Trust me, it’s worth the wait!
3. Shaping the Cookies
I love using a cookie scoop to portion out my dough. It ensures that each cookie is the same size, which means they’ll bake evenly. If you don’t have a scoop, a tablespoon will work just fine.
4. Baking the Cookies
Preheat your oven to 350°F (175°C) and line a baking sheet with parchment paper. Bake the cookies for 10-12 minutes, until the edges are golden brown and the centers are just set. Be careful not to overbake them—the cookies will continue to firm up as they cool.
5. Cooling and Storing
Once out of the oven, let the cookies cool on the baking sheet for a few minutes before transferring them to a wire rack. If you can resist eating them all at once, store any leftovers in an airtight container—they’ll stay soft and chewy for days!
Troubleshooting Common Cookie Issues
Sometimes things don’t go quite as planned. Here are a few tips to help you troubleshoot:
Flat cookies:
If your cookies are spreading too much, consider chilling the dough for an extended period, ideally following the recommended chilling time in the recipe. Additionally, make sure that the butter you use in the recipe is not too warm, as this can cause the cookies to spread too much while baking.
Dry cookies:
The problem of dry cookies is frequently caused by overbaking or using an excessive amount of flour. To avoid this, accurately measure the flour using the spoon and level technique. It is important to bake the cookies just until the edges are set to prevent overbaking, which can lead to a dry and crumbly texture.
These classic chocolate chip cookies are very easy to make and almost impossible to forget. Whether you’re a seasoned baker or just beginning your baking adventures, this recipe is simple enough to follow and delivers every time. Plus, who can resist the smell of freshly baked cookies filling the house?
There’s something undeniably comforting about baking a batch of chocolate chip cookies. It’s not just about the end result—it’s about the process. The smell of the dough, the anticipation as they bake, and the satisfaction of biting into that first warm cookie. I hope this recipe becomes a go-to in your kitchen like it has in mine.
If you try this recipe, I’d love to hear how it turned out! Share your experience or any fun twists you tried in the comments below. Happy baking!


