 Recipe Treasure Chest
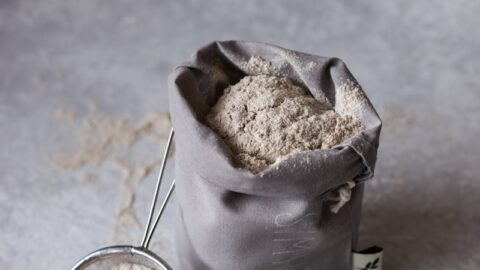
If you’re anything like me, you know that achieving baking perfection is like catching a unicorn – magical, but not always easy. But fear not, because today, we’re diving into the world of flour measurements, the crucial foundation behind every fluffy cake and crispy cookie. So, roll up your sleeves and let’s get ready to conquer the kitchen!
The Flour Factor: Why Measurements Matter
Baking is like chemistry, and flour is our main ingredient. It’s not just about throwing a cup of flour into the mix and hoping for the best – oh no! Every gram counts, and accurate measurements can make or break your bake. Trust me, I’ve learned this the hard way. One time, I eyeballed the flour for a batch of cookies, and let’s just say they ended up as flat as pancakes. Lesson learned: precision is key!
Flour measurements impact everything from texture to structure and flavor. Too much flour can make your baked goods dense and dry, while too little can result in a batter that’s too runny, leading to flat or unevenly baked products. Accurate measurements ensure consistency and reliability, which are the cornerstones of successful baking.
Know Thy Flour: Types and Traits
Before we jump into measurements, let’s talk flour. There’s a whole world out there beyond the basic all-purpose stuff. Bread flour, cake flour, whole wheat flour – each brings its own personality to the party.
All-Purpose Flour
- Traits: The jack-of-all-trades, with a protein content ranging from 10-12%.
- Uses: Suitable for most baking needs. It’s your go-to for cookies, muffins, quick breads, and even some cakes. Its moderate protein content provides enough structure for these baked goods while keeping them tender.
- Tip: If a recipe calls for specific flour and you only have all-purpose, you can often make a substitution with a slight adjustment. For example, if you’re making a cake, you can remove two tablespoons of all-purpose flour and replace it with two tablespoons of cornstarch to mimic cake flour.
Bread Flour
- Traits: High in protein, usually between 12-14%, which contributes to its strength and elasticity.
- Uses: Perfect for yeast breads and pizza doughs. The high protein content develops more gluten when mixed and kneaded, which provides the chewy texture and strong structure needed to hold up to rising and baking.
- Tip: When making chewy cookies or other baked goods that need a little extra structure, you can substitute some of the all-purpose flour with bread flour.
Whole Wheat Flour
- Traits: Contains the entire wheat kernel, including the bran, germ, and endosperm, giving it a higher fiber content and a denser texture.
- Uses: Great for hearty breads, muffins, pancakes, and cookies. It adds a nutty flavor and dense texture to baked goods. However, because of the bran and germ, it can also make the dough heavier and denser.
- Tip: When substituting whole wheat flour for all-purpose flour, start by replacing half the amount and gradually increase as you get used to working with it. Whole wheat flour absorbs more liquid, so you might need to adjust the amount of liquid in your recipe.
Self-Rising Flour
- Traits: All-purpose flour with added baking powder and salt.
- Uses: Convenient for quick breads, biscuits, and pancakes where you want a reliable rise without adding separate leavening agents.
- Tip: If you don’t have self-rising flour, you can make your own by adding 1 1/2 teaspoons of baking powder and 1/4 teaspoon of salt to one cup of all-purpose flour.
Cake Flour
- Traits: With a low protein content, typically around 7-9%, cake flour is milled to a fine consistency.
- Uses: Ideal for tender, soft baked goods like cakes, cupcakes, and some cookies. Its low protein content results in less gluten formation, which means a softer, finer crumb.
- Tip: If you don’t have cake flour, you can make your own by measuring out one cup of all-purpose flour, removing two tablespoons, and replacing them with two tablespoons of cornstarch. Sift the mixture several times to ensure it’s well combined.
Pastry Flour
- Traits: Falls between all-purpose and cake flour in terms of protein content, usually around 8-10%.
- Uses: Excellent for pie crusts, tarts, and some cookies. It provides enough structure to hold the baked goods together but keeps them tender and flaky.
- Tip: Pastry flour can often be substituted with a mix of 1/3 cup cake flour and 2/3 cup all-purpose flour if you don’t have it on hand.
Gluten-Free Flour
- Traits: A mix of different gluten-free grains, nuts, or legumes like rice flour, almond flour, coconut flour, and chickpea flour.
- Uses: Essential for those with gluten intolerance or celiac disease. Each type of gluten-free flour has unique properties and is often used in combination with others to achieve the desired texture and flavor.
- Tip: When baking gluten-free, use a blend of different gluten-free flours and consider adding a binding agent like xanthan gum to help with structure and texture.
Understanding your flour’s personality can help you choose the right type for your recipe and adjust measurements and techniques accordingly.
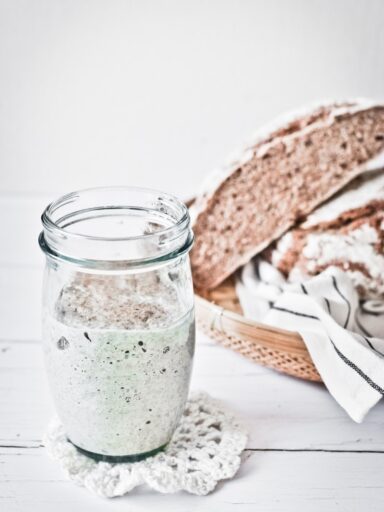
Measuring: Techniques That Work
Now, onto the nitty-gritty: measuring techniques. You’ve got three main options: the precise kitchen scale, the spoon and level method, and the dip and sweep method. Let’s break them down.
Precise Kitchen Scale:
For ultimate accuracy, nothing beats a kitchen scale. It’s like having your own personal baking wizard, ensuring every measurement is spot-on.
- Zero the Scale: Place your bowl on the scale and zero it out.
- Add Flour: Slowly add flour until you reach the desired weight. Standard weights for flour are typically around 120 grams per cup for all-purpose flour, but it’s always best to check your recipe for specifics.
Using a scale eliminates guesswork and variability, ensuring consistent results every time. Many professional bakers swear by this method for its precision.
Spoon and Level Method:
- Fluff the Flour: Use a spoon to stir the flour in its container, aerating it and breaking up any clumps.
- Spoon the Flour: Gently spoon the flour into your measuring cup until it overflows.
- Level it Off: Use the back of a knife or a straight edge to sweep across the top, leveling off the excess.
This technique avoids compacting the flour, ensuring an accurate measurement. It’s perfect for recipes where precision is crucial.
Dip and Sweep Method:
If you’re in a hurry or feeling a bit lazy (no judgment here), the dip and sweep method might be more your style. Just be cautious:
- Fluff the Flour: Use a spoon to stir the flour in its container, aerating it and breaking up any clumps.
- Dip the Cup: Dunk your measuring cup into the flour bag or container until it’s heaped.
- Sweep Off the Excess: Use the back of a knife or a straight edge to sweep across the top, leveling the flour.
While quicker, this method can pack the flour down slightly, leading to a bit more flour in your cup than intended. Use this method for less delicate recipes.
For Flour-tastic Results
Alright, you’ve got your technique down, but let’s sprinkle in some extra tips to take your baking game to the next level.
- Scale it Up: Invest in a kitchen scale for ultimate accuracy. Trust me, it’s a game-changer. Not only does it ensure precision, but it also speeds up your prep time by eliminating the need for multiple measuring cups. I ditched the measuring cups years ago and it definitely made a difference.
- Sift Away: Give your flour a little fluff before measuring by sifting it. Sifting breaks up clumps and aerates the flour, leading to lighter and more consistent baked goods.
- Let it Settle: If your flour has been jostled around, let it settle for a minute before measuring. Think of it as giving your flour time to find its zen. This helps avoid compacted flour, which can throw off your measurements.
- No Scooping: Resist the urge to scoop flour straight from the bag – it’ll pack down and throw off your measurements.
Adjusting on the Fly: Some Flour Hacks
Life happens, and sometimes our flour measurements need a little adjustment. Maybe it’s humid outside, or you’re baking at a high altitude – whatever the case, we’ve got solutions!
Humidity Hack: If it’s humid outside, reduce your flour slightly to account for the extra moisture in the air. Humidity can cause flour to absorb moisture, resulting in heavier, denser doughs and batters.
Altitude Adjustment: Baking in the mountains? Add a touch more flour to counteract the effects of lower air pressure. At higher altitudes, baked goods can rise too quickly and then collapse. Adding extra flour helps stabilize the structure.
Armed with the knowledge of different flour types, measuring techniques, and handy hacks, there’s no baking challenge you can’t tackle. So, go forth and conquer the kitchen – I’ll be here cheering you on with a freshly baked treat in hand! In the delightful world of baking, precision is paramount. From measuring ingredients to controlling oven temperature, every detail contributes to the final outcome of your cooking and baking creation. Among these details, flour measurements play a crucial role in achieving the perfect bake. Whether you’re a seasoned baker or just starting on your baking journey, understanding the nuances of flour measurements can elevate your skills to new heights.
By mastering the art of flour measurements, you can unlock the full potential of your baking endeavors, ensuring that every cake, cookie, and loaf of bread emerges from the oven with perfection. In the delightful world of baking, precision is paramount. From measuring ingredients to controlling oven temperature, every detail contributes to the final outcome of your cooking and baking creation. Among these details, flour measurements play a crucial role in achieving the perfect bake. Whether you’re a seasoned baker or just starting on your baking journey, understanding the nuances of flour measurements can elevate your skills to new heights.
By mastering the art of flour measurements, you can unlock the full potential of your baking endeavors.
Fun Flour Facts
Fun Flour Fact
Flour Shelf Life: All purpose flour can last up to 8 months if stored in an airtight container in a cool, dry place. Whole wheat flour, however, has a shorter shelf life due to its higher oil content. Refrigerating or freezing flour extends its shelf life.
Flour Innovations:Gluten-free flours like almond, coconut, and rice flour are gaining popularity. They each have unique properties and can often be used as substitutes in various recipes.
Historical Tidbit: Did you know that the earliest evidence of flour dates back to around 6000 BC? Our ancestors were grinding grains between stones long before the advent of modern baking.